How To Assemble A Shropshire Oak Ledged Door
Introduction
For those of you who order our Shropshire Solid Oak Doors in a kit form, this guide shows each and every step required for the assembly of these doors.
If you are looking for information on how to assemble our 4 ledge solid oak door, our guide for that process can be seen by clicking here.
(![]() To download a printable pdf version of this guide, click here)
To download a printable pdf version of this guide, click here)
What You Will Need
- Level workbench with 2 or 3 softwood battens to rest the door planks on
- Tape measure
- Nylon hammer/mallet
- Steel hammer
- 2mm Spacers
- Set Square
- Screwdriver (quicker and easier with an electric screwdriver)
- Countersink 12mm Drill Bit
- Sharp 1 inch chisel
- PVA glue
- Steel cabinet scraper OR 120 grit sand paper and a sanding block
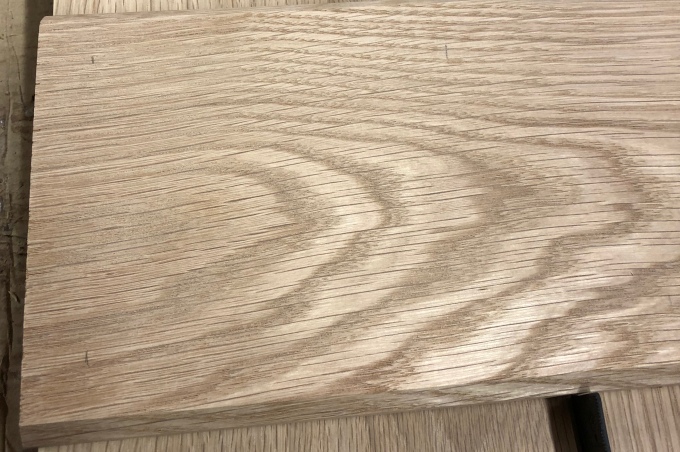
1. Unpack Door Components
Begin by removing the cellophane wrapping from the Shropshire solid oak door kit. Check your package to ensure that it includes the following:
- 4 or 5 x oak door boards (dependant on size of oak door)
- 3 x oak ledges
- 36 x crosshead self tapping screws
- 36 x oak plugs
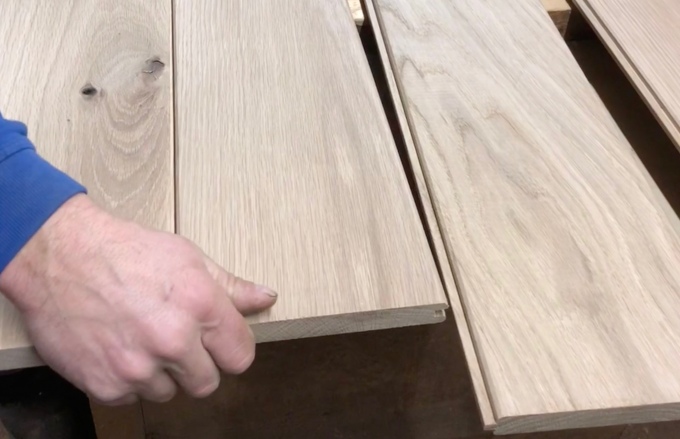
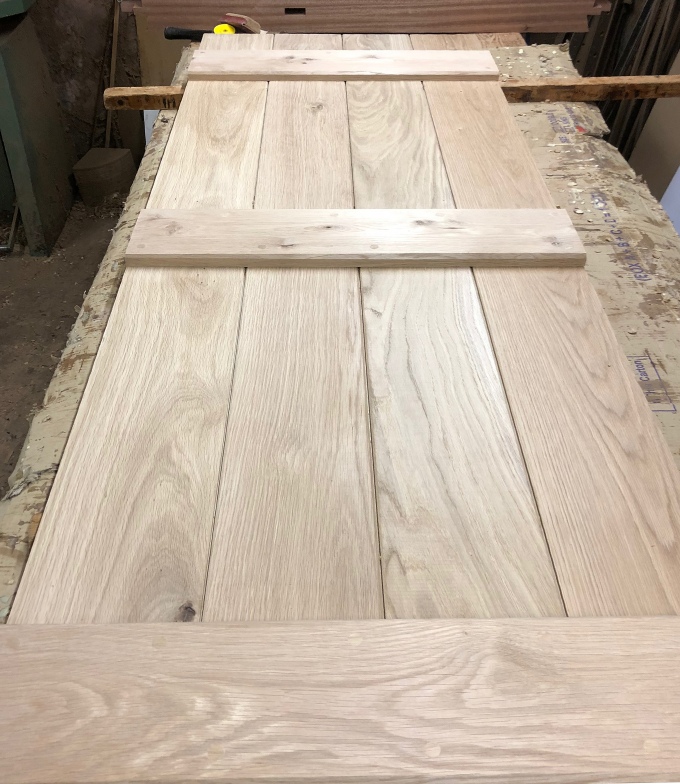
2. Lay Out Door Boards
Lay out the oak door boards onto the softwood battens on your workbench - front face down.
The top of the door is the most visible part of your door. Take a look at the boards and decide which end of the boards you prefer to have at the top of the door.
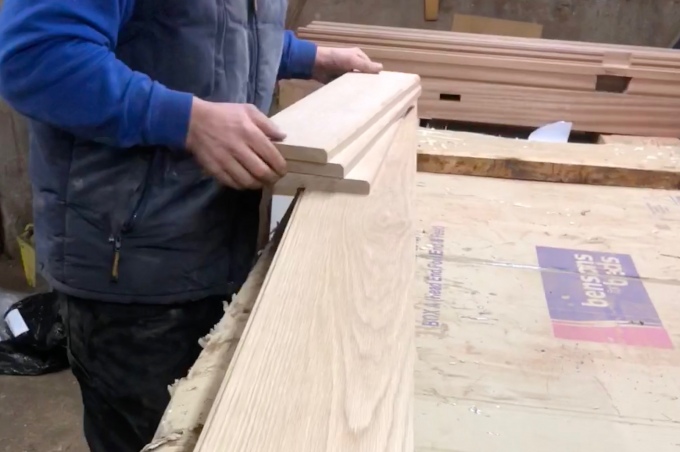
3. Push The Boards Together
Push the tongues into the grooves on each board to assemble.
Do not glue the tongue or grooves.

4. Set The Spacers
To achieve the specified width of door, spacers may be required. Carefully insert a 2mm spacer in between each of the door boards at both ends.
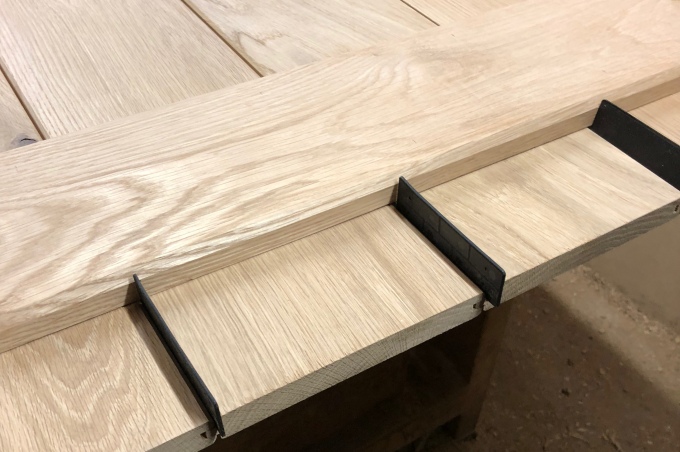

Your solid oak door should now resemble your specified width of door. If required, adjust the spacers further to suit your door size.
5. Level The Door Board Tops
Level out the door board tops using a soft nylon hammer.
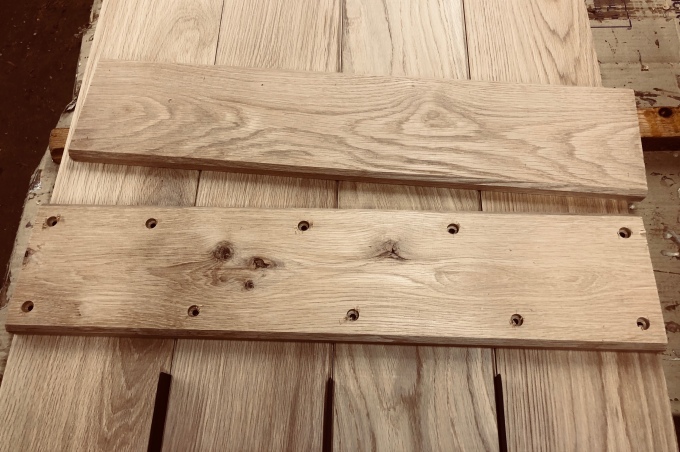
6. Marking & Drilling The Ledges
The next step is to create a mark on the ledges where you will later drill into. Place the ledge across the door boards. This will allow you to use the boards below as a guide.
The first holes you need to mark are those at the end of each of the ledges. Here we need to make two marks, one at the top of the ledge, one at the bottom. We normally suggest that the hole centres are made around 20-25mm from each side of the ledge.

Now the remaining holes can be marked. Using the door boards below as a guide, a single mark should be made at the top of the ledge for each door board underneath. So if you have four boards below, four marks need to be made. Each mark should be made to the left side of the edge of the door board below. Again this is normally 25mm to the centre from the top and side.
The markings for the bottom of the ledge should now be made. Using the same principle, draw one mark for each door board underneath. This time the mark should be around 25mm to the right from the edge of the door board below.
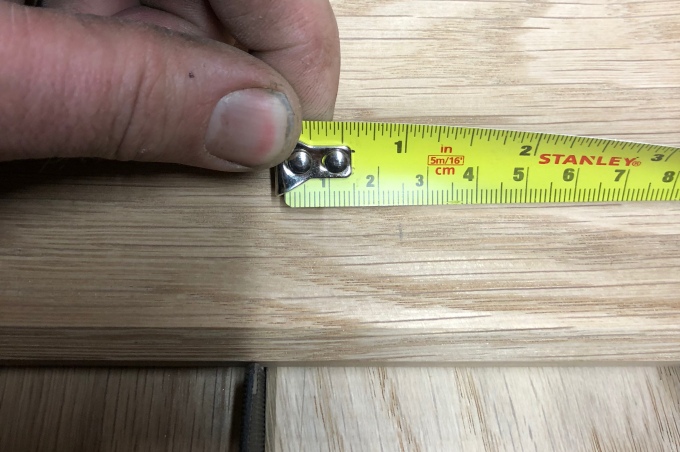
This process should now be repeated for the remaining ledges. Using a set square at this point will allow you to copy your markings - without the need for remeasuring.
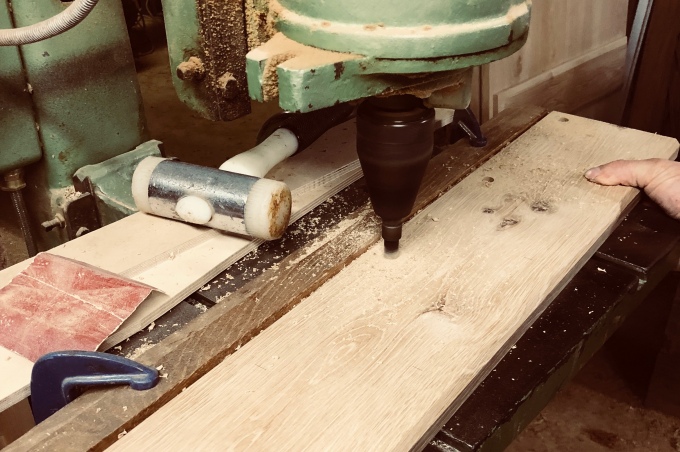
Your markings can now be drilled using a 12mm countersink drill bit to create your fixing holes.


7. Lay Out The Oak Ledges
Lay out the solid oak ledges in position on the door boards. We suggest selecting the best ledge for the top of the door, the next best for the middle, and the next for the third.
Ensure that all of the drilled holes are placed in the same order on each ledge.
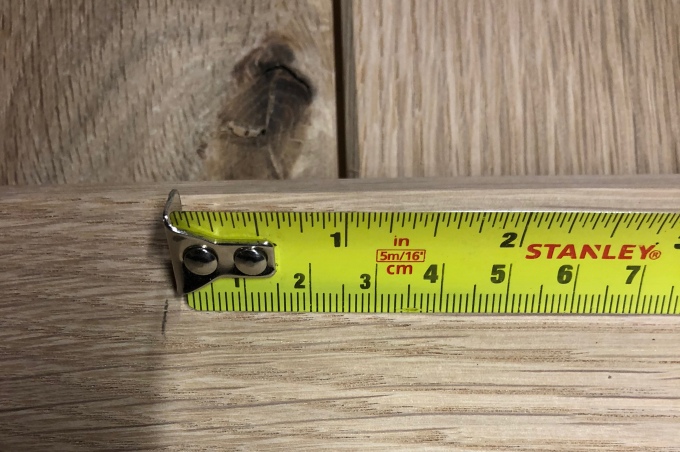
The top edge of the top ledge should be placed 4" from the door top.

The bottom ledge should be placed 7" from the door bottom.

The middle ledge should now be placed evenly spaced and parallel in the centre.

8. Screw The Ledges Into Place
Starting with the top ledge, fix the screws through the drilled hole at the end of the ledge. This will instantly brace the top of the door. Glue should not be used to fit the ledges into place.
Care should be taken not to damage the edges of the hole with the screw or drill to ensure a perfect finish once complete.
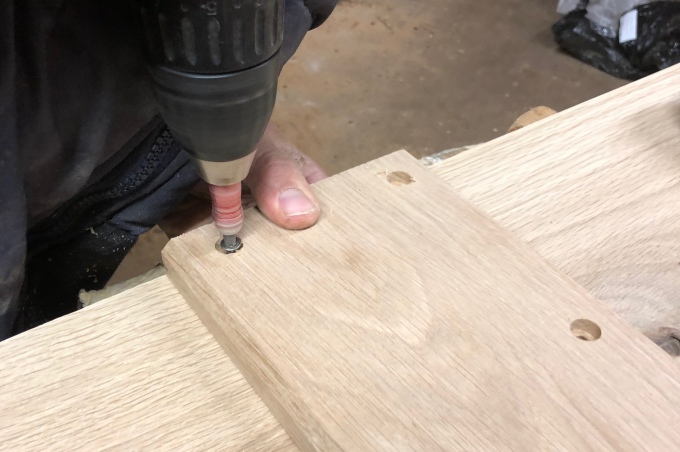
Repeat the same process with the bottom ledge.
The remaining screws can now be drilled into place for the remainder of the holes.
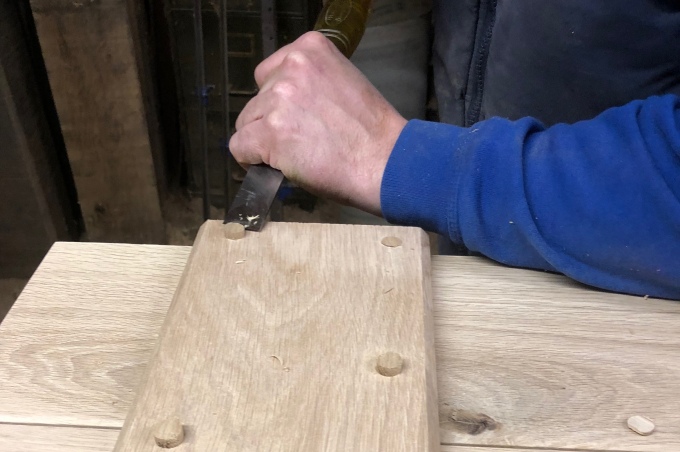
9. Fit The Oak Plugs
Apply a small pea-sized blob of PVA glue to each plug hole.
Take an oak plug, aligning its grain with the grain of the ledge.
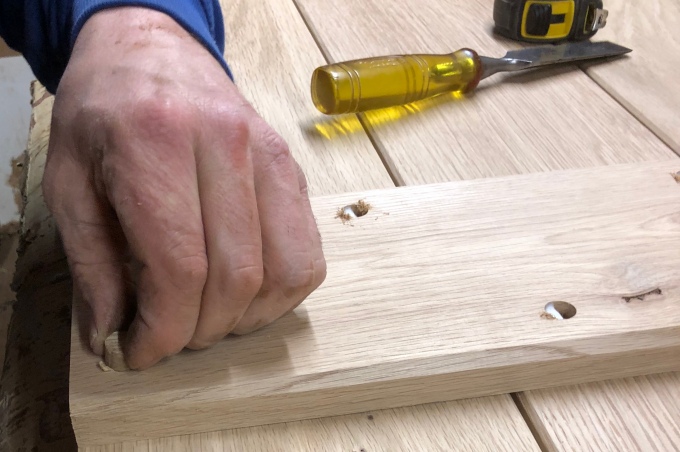
Hammer the oak plug into the plug hole. Leave around 5mm of the plug proud of the ledge surface.

Use a sharp 1" wood chisel on its chiselled edge to remove the bulk of the plug excess.
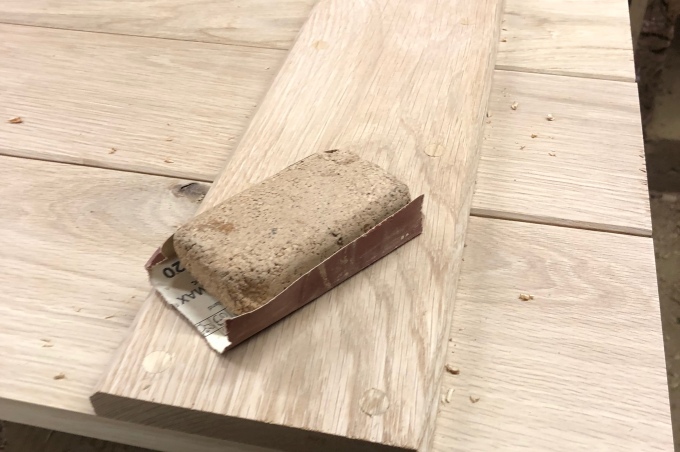
10. Finish Off The Ledges
To ensure that you have a smooth finish to the ledges, use either a steel cabinet scraper or 120 grit sandpaper on a sanding block to remove any rougher areas.
11. Job Done!
Your assembled Shropshire Solid Oak Door can now be finished and fitted!

Add a comment