How To Fit An Oak Floor

Introduction
Ever wondered how to fit an oak floor? With this in mind we have created this handy guide showing the different stages of one of our recent installations.
Throughout this guide we have enlisted the help of one of our highly skilled floor fitters, as he shares some of his helpful tips and tricks from his experience in the trade.
(![]() To download a printable pdf version of this guide, click here)
To download a printable pdf version of this guide, click here)
Glueing Method - Engineered Oak Flooring
In this particular floor fit, the Hakwood Bonneval engineered oak boards were fitted by glueing them to the sub-floor, which had an underfloor heating system already installed.
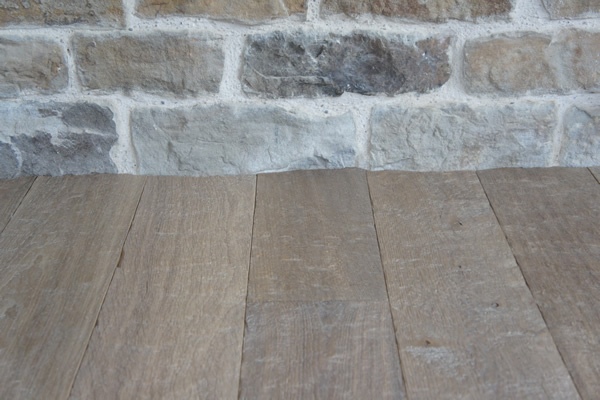
To make things extra tricky, one side of our room had a plastered wall which would eventually have skirting running along it. On the other side, there was a pointed stone wall, where the flooring needed to run clean up to the edge of the wall, and would therefore require some scribing. A timber frame partition ran parallel to the outside wall.

Summary
Positioning and Cutting The Boards
Preparing Your Sub-floor
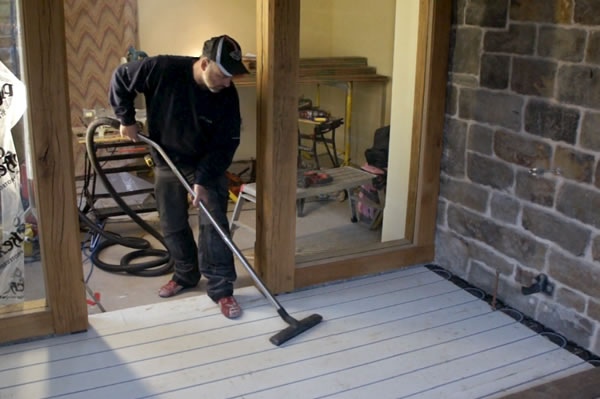
Before you even begin to fit your oak flooring, the first task is to properly prepare the sub-floor.
First, check the overall condition of the sub-floor.
Is the moisture content of the floor within acceptable levels?
For a concrete sub-floor, the moisture content should be lower than 4% - a sub-floor which has not been properly dried out will only cause problems to your oak flooring in the future.
Please Note: Oak flooring should be given time to acclimatise to its surroundings before fitting.
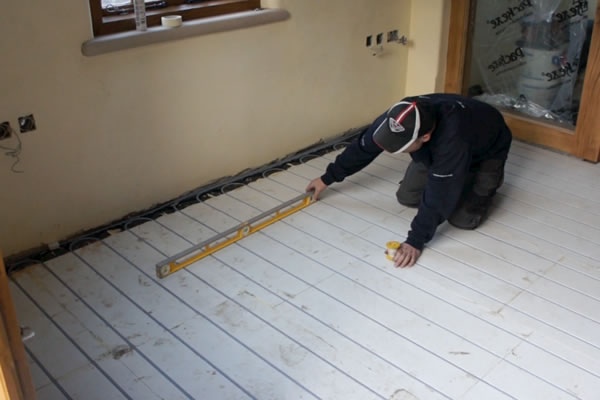
Once it has been established that the sub-floor is dry enough, the next job is to check that it is reasonably level. This should be done using a spirit level, which should be placed at various intervals around the room. The levels should not vary more than +/- 2mm per metre. Check the edges of the room for rises and dips, ensuring you have a flat, even surface to work from.
Finally, decide which way the boards will be laid across the room. This is of course up to you, but in general, it's quite obvious when you loose lay a few boards on the floor, which way "looks right".
Finding The Datum Line
The first task is to look at how the boards will fit to the walls and to check that the walls are parallel enough to work with.
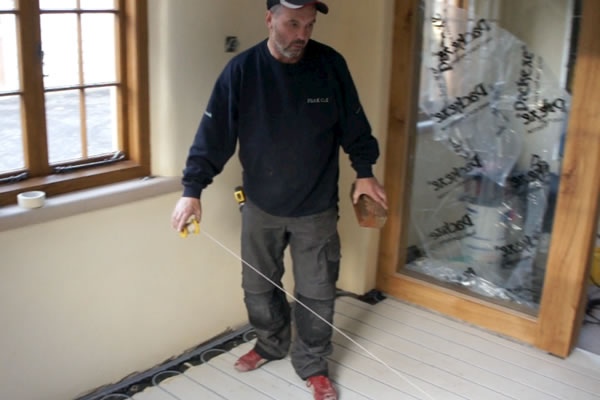
We can do this by creating what is known as a datum line which stretches across the room and works as a reference point to check that the walls are parallel.
To create this line, simply take a piece of string and stretch it from one side of the room to the other. This line should run in the same direction as your lengths of flooring will run.
With the datum in place, you can now measure from the wall to the line at different points, to check that the walls are parallel.
Using the datum line means you can also measure any doors or alcoves.
The key reason for using the datum line is to help to position the first board and to ensure you get a nice balance of boards across the room. If you simply rush into fitting the first board, you could easily end up with a large cut of board on one side of the room and a very small cut of board on the other.
Positioning The First Board
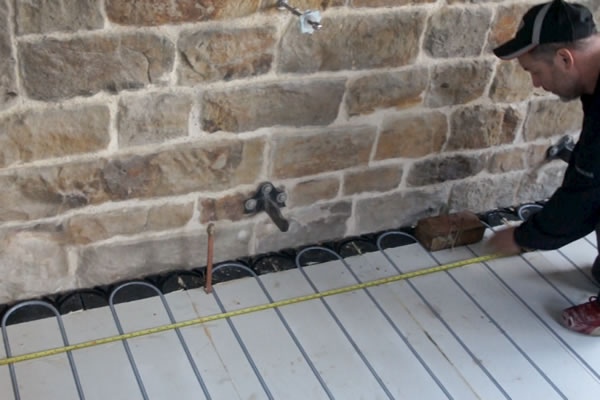
Now that we have established that our room is reasonably parallel, we can proceed with positioning the boards. This is done by measuring from the edge of the room to the datum.
Mark a line at the point where a first full board can be placed.
To check that there are no problems later on, measure from the marked line to the other side of the room. Check to ensure that you are not going to be left with a very small width of board at the end.
For example if you were fitting a 180mm wide board and the mark to other side of the room measurement was 1.80 metres the calculation would be as follows:
1.80 / 0.18 = 10
This would mean that 10 full boards would be used, leaving no need for a small width on the other side of the room.
However if the measurement from the mark to the other side of the room was 1.89m, the calculation would be as follows:
1.89 / 0.18 = 10.50
This would mean 10 full boards could be fitted with half a board at the end of the room.
In our case we were left with around 3/4 of a width board at the end of the room.
Please Note: We recommend that a 10mm expansion gap is left around your oak flooring. This will allow for the oak flooring to expand and contract as the seasons change, without causing any structural damage. These gaps can be covered with your skirting.
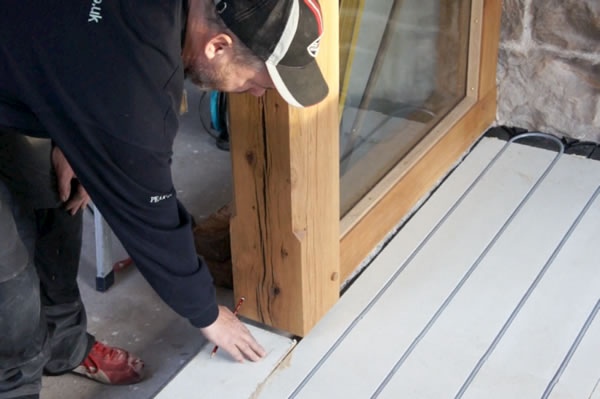
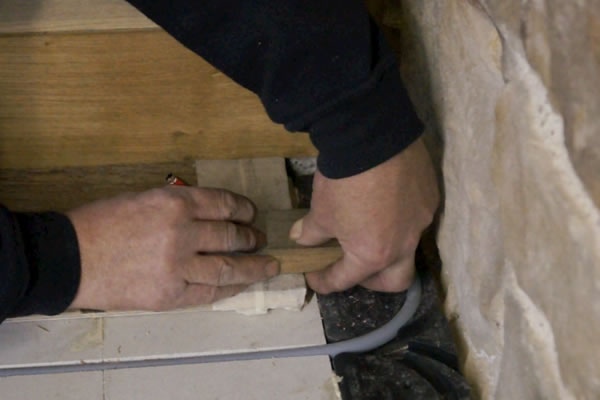
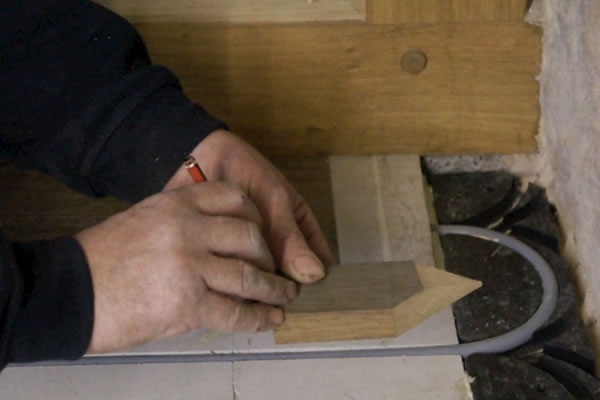
Allowing For Partition Frames
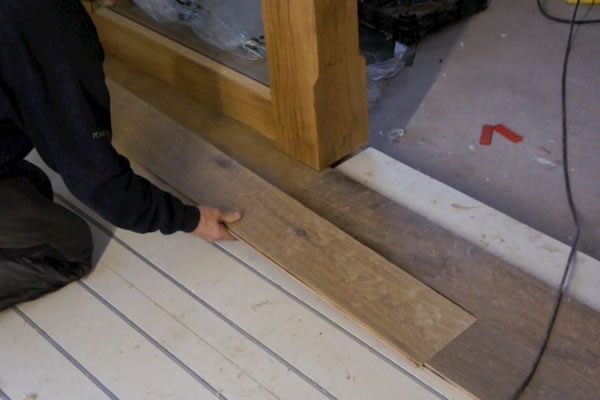
When fitting your oak flooring, you may have to deal with certain structural features which are completely unique to you. In our case we had to lay our first board up against and under an oak partition frame. To achieve this we needed to create a gap which was big enough for the board to fit under.
We did this by taking an off-cut of one of the oak boards and turning it upside down. The board was placed next to the frame, which we marked using a handsaw. We repeated this process for all sides of the frame. Once marked, the partition frame was cut using an electric saw.
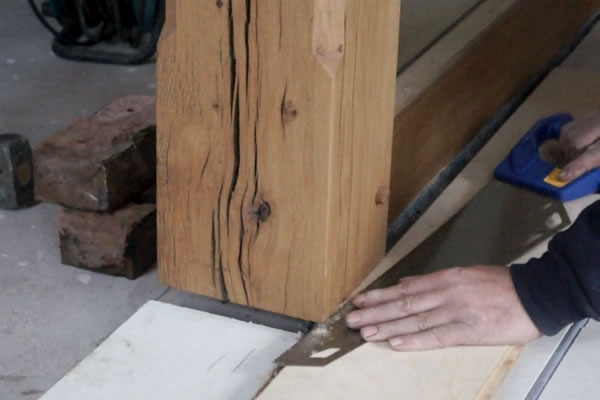
Scribing Your Oak Flooring
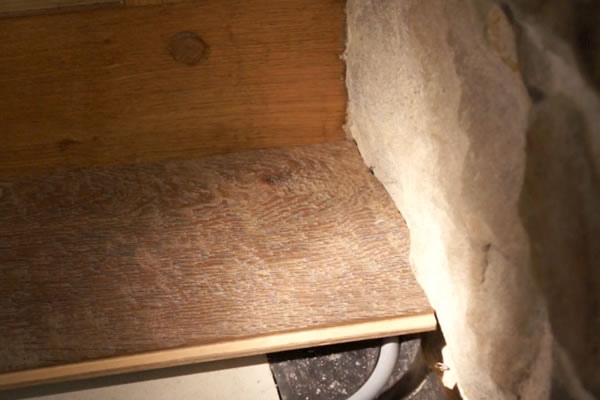
As mentioned previously, one side of our room had a plastered wall whilst the other had a pointed stone wall. To allow the flooring to run clean up against the edge of the wall, the flooring needed to be scribed.
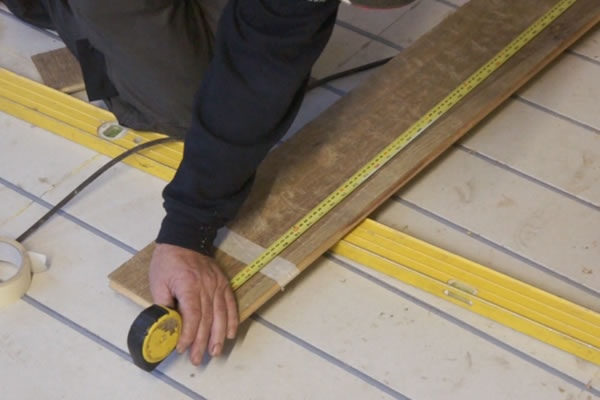
Begin by placing a small amount of masking tape over the edge of the board to be scribed.
You can make a scribing tool like the one shown here by taking a small block of wood cut to form a sharp pointed edge one one side and a flat edge on the other. To allow for greater accuracy, cut a groove in the flat edge to hold a pencil in place.
With the pointed edge against the wall and the pencil held in place by the groove, slowly run along the wall drawing the outline onto the masking tape covering the end of the floorboard. This will give an identical representation of the wall's undulations, marking where you will need to cut.
Once the scribed edge has been marked out, cut along the marked line carefully using a jigsaw. As our board is a specially textured board, our fitter cut using the jigsaw upside down. The main reason for this is that if the jigsaw is used conventionally, there is a possibility of the wood splitting upward, which would be visible on the finished top surface. Using the jigsaw upside down ensures that, should the wood split or splinter, it will happen to the underside of the board, where it will not be seen once laid.
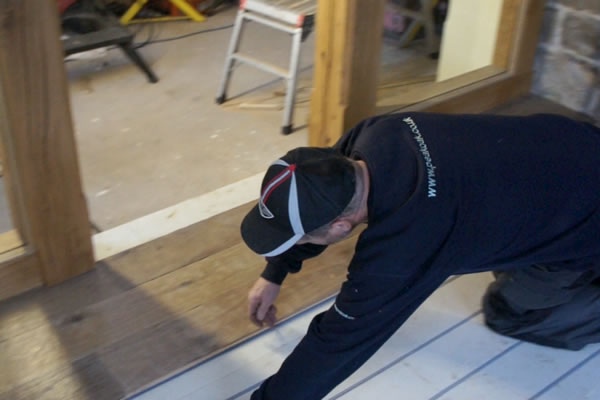
Now that the scribe has been marked and cut, the final job is to check that the scribe has worked. To do this, simply slide the board into place so that it fits perfectly up against the wall.
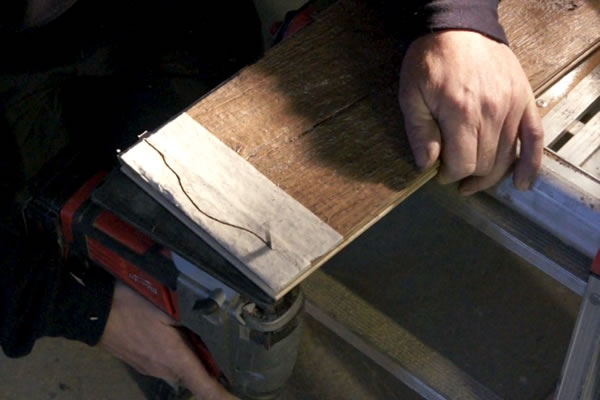
Positioning And Cutting The Boards
Once the first row of boards has been positioned and scribed, we continue with the rest of the floor.
For a more natural looking floor, you need to stagger the joints so they do not appear uniform. This involves using different lengths of boards across the room.
To help you in this process, we recommend that the off-cut from the last board of the previous row, is used as the starting board for the next row. If this process starts to leave you with very uniform joints, you can break this up by cutting a board separately and continuing from there.
When cutting your oak boards always make sure that you measure accurately. When using textured boards, it can often be much easier to place a piece of masking tape onto the board and make your mark in pencil over it. As mentioned previously we recommend that a 10mm gap is left around your room for your boards to expand and contract. This 10mm should be taken off your measurement.
It's at this point that you congratulate yourself on having spent a little bit more on high quality flooring rather than going for the cheap flooring you thought would be just as good! With high quality flooring, you will find the process of pushing boards into place much easier then with cheap, low quality boards. Highest quality boards have much better machining accuracy in the tongue and grooves ensuring that they fit together with a tight, satisfying "clack" and a lovely even joint.
Glueing The Oak Boards
With the first few rows of boards trial fitted in place, we can prepare for the glueing process. Begin by marking the sub-floor either side of the laid boards using a pencil. This defines the area where you will apply the adhesive to the sub-floor.
Next, lift the boards and stack them somewhere in the order you plan to re-lay them.
Once the boards have been removed, clean the marked out area to remove excess dust or dirt. Any irregularities could negatively affect the adhesion.
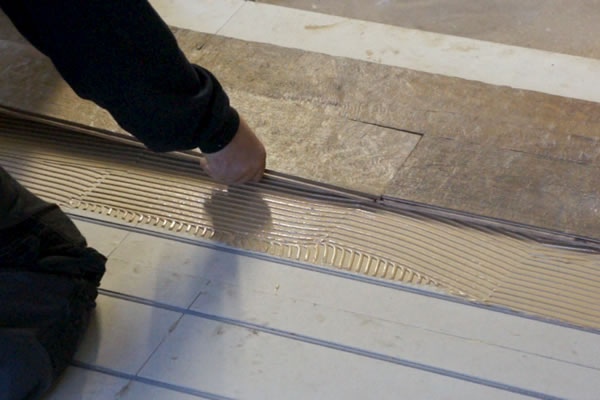
Now that we have cleaned the surface area, we can start glueing.
In our case we decided to trowel our glue on, rather than using a glue gun applicator and zig-zagging the glue across.
We chose this method because our room had underfloor heating fitted. To transfer the maximum amount of heat from the pipes in the sub-floor, through the oak floor and into the room, there must be no air between the sub-floor and the oak boards.
Please Note: Using a zig-zag glueing technique leaves air gaps and should not be used with underfloor heating systems.
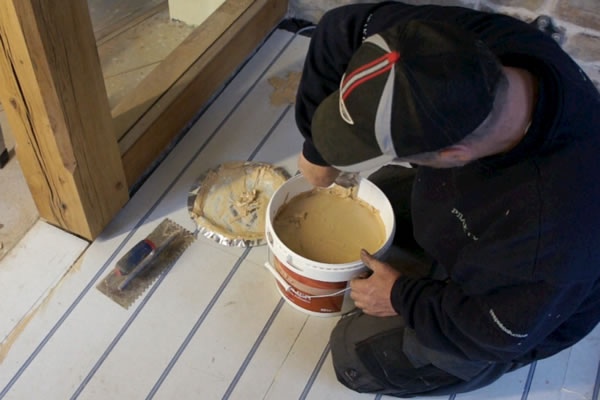
Before trowelling the glue on, it is important to check the consistency of the glue to ensure it creates a nice smooth finish. Any hard “crusted” areas should be removed beforehand so that they do not affect the adhesion.
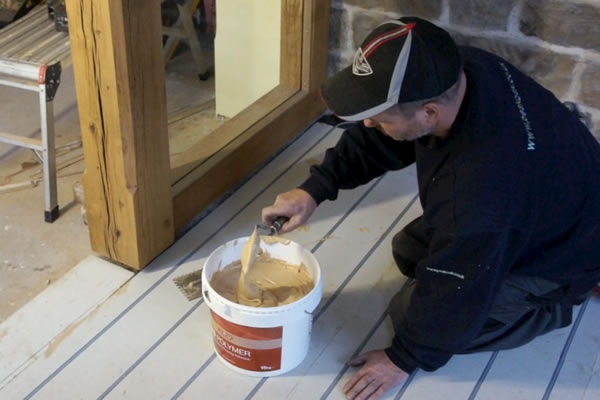
You can now begin to trowel your glue onto the sub-floor. In this example we have used a 6mm grooved trowel to apply the adhesive. When the trowel is standing upright the grooves are 6mm, however when trowelling you will normally work at a 45 degree angle, which in reality makes the height of the notch only 3mm. We believe this height gives much better adhesion between the board and sub-floor.
Please Note: When applying the adhesive make sure to not go over the marked lines, but instead slightly back from them to avoid problems if the glue sets before the next set of boards are laid.
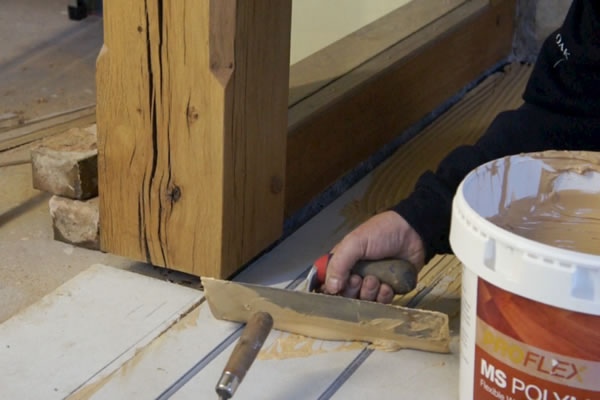
After applying the adhesive evenly across the marked area, you can now begin to fit your boards into place.
As the positions of the boards were established earlier, simply re-lay them in the same place onto the adhesive bed.
Continue this process across your marked area until it is completely covered.
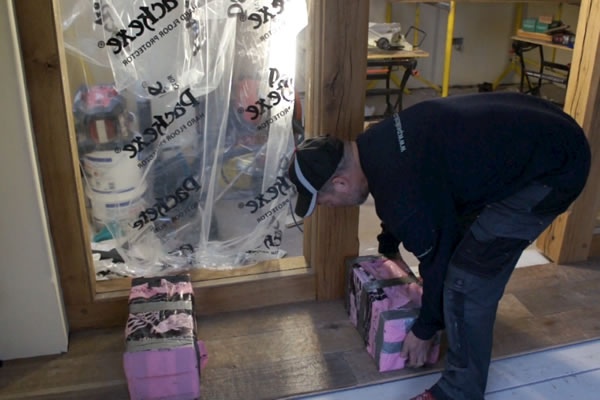
To help with adhesion, we recommend that you place weights over the top of the fitted boards. We used some concrete blocks wrapped in bubble wrap and a plastic bag to protect the boards. These can be left for as long as the adhesive takes to set.
Simply repeat the process of trial fitting a few rows of floorboards, marking the sub-floor, lifting the boards, applying the glue, re-laying the boards and weighing them down until the whole room is complete.
Finish off by fitting skirting boards over the 10mm expansion gap where necessary and apply any floor finishes if you've fitted an unfinished oak floor.
Job Done!

4 Comments
you recommend leaving a 10mm gap around the room but then fit tight to a brick wall ...am confused ?
ian russell August 18, 2013 at 9:25pm
Hi Ian,
Generally when a board expands, this will only really affect the width of the board. This is why a 10mm gap has been left along the width of the board. Of course every situation is different but in this case it allowed us to go tight up to the wall.
I hope this answers your question.
Peak Oak August 20, 2013 at 11:39am
You must give me the make of the electric saw that can make a cut 20mm parallel to a floor.
Eddie Curtis August 21, 2014 at 5:49pm
What adhesive should I use for a liquid screed calcium anhydrite (?) floor? At the moment I have put a polythene damp proof membrane on the screed and green wood fibre pads on that with a cheap laminate floor on top. Would be grateful for advice on using your prime grade oak flooring.
Many thanks
Geoff August 30, 2014 at 11:26pm
Add a comment