Sanding And Recoating Oak Flooring
Introduction
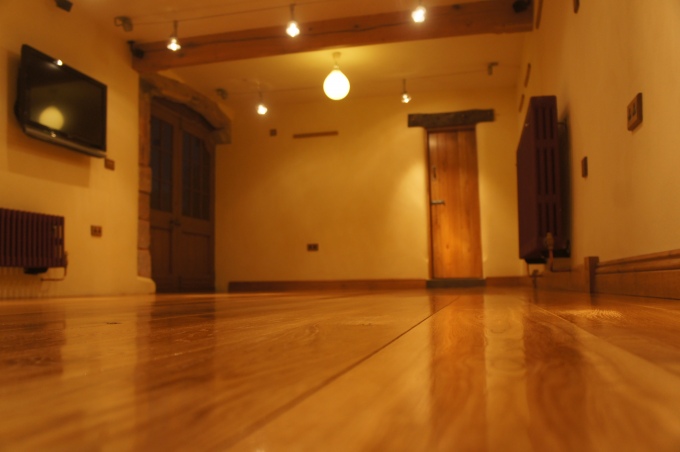
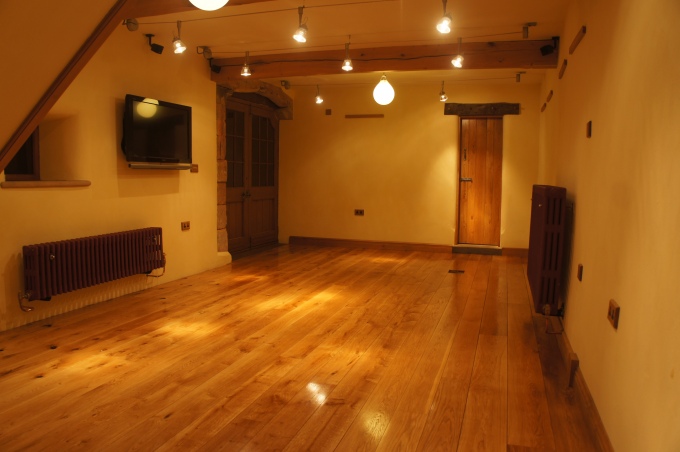
Would you believe its 16 years from the time of writing since our showroom opened its doors and our main oak flooring area has been in use? We’ve welcomed thousands of you through our doors to take a look at everything we have to offer.
Throughout this period, our showroom oak flooring has simply been maintained and cleaned, as per our guide on How To Maintain Your Oak Floor Finish.
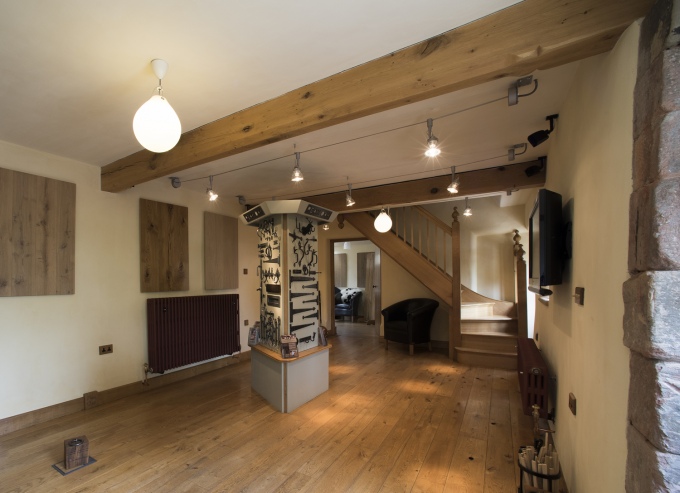
Oak flooring will naturally darken over time as areas of wear and tear become more apparent. This is exactly what has happened inside our showroom, with such a high footfall.
The main area this occurred was at the entrance into the showroom. This section got the most wear as wet, dirt, grit, snow and animals enter the showroom - we’ve had it all! Other areas have also worn - but to a lesser extent.
After years of heavy use, we recently decided that now is the time to sand down the finish to the bare timber, recoat, and bring the area back to life!
In this guide, we take you through our process of sanding oak flooring and re-coating oak flooring.
(![]() To download a printable pdf version of this guide, click here)
To download a printable pdf version of this guide, click here)
Sanding
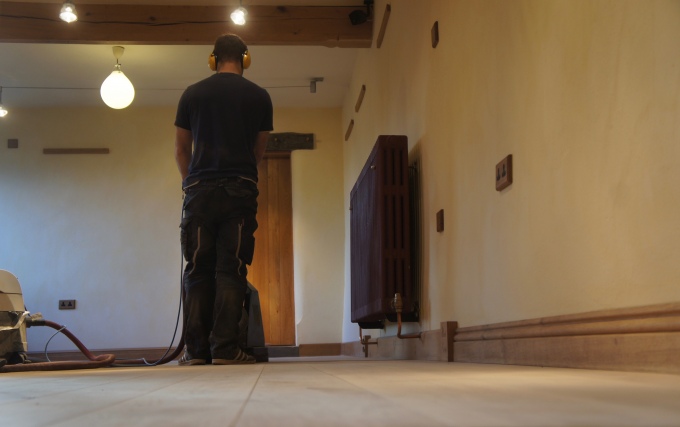
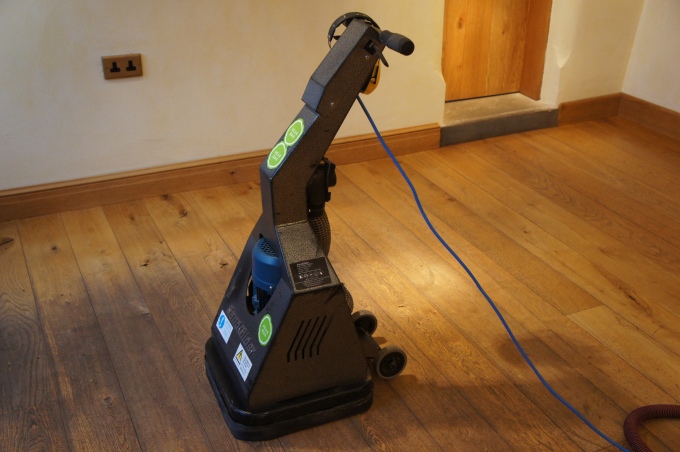
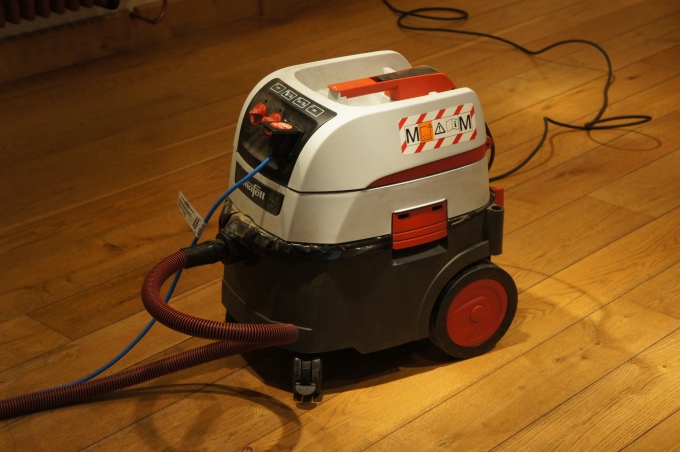
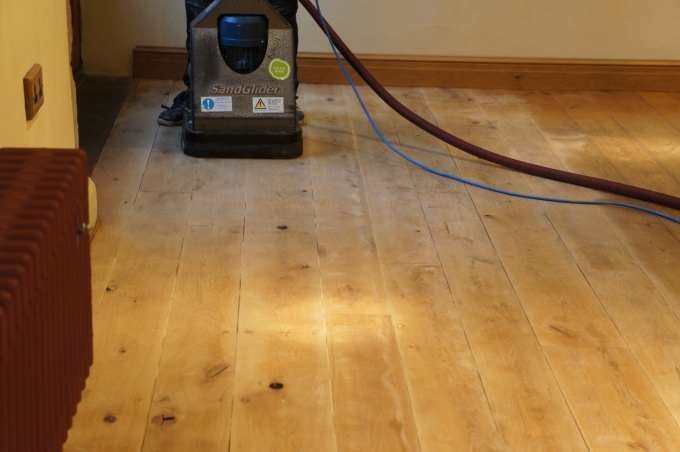
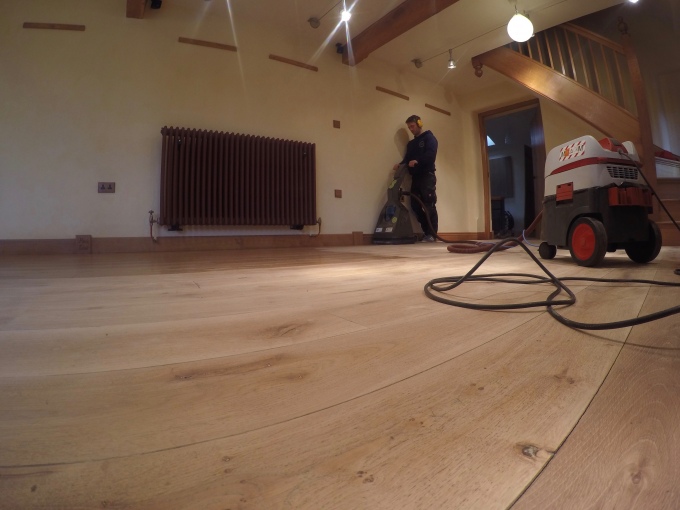
For the sanding process, this can be done by hand, but it is much quicker in larger areas to use a floor sander.
It is first important that the right safety equipment is used. We recommend using a sander which can connect to a dust extractor, which not only protects yourself from harmful particles, but also ensures a much cleaner work area. For loud machines, adequate ear protection is also recommended.
With all the safety checks in place, and the room removed of any obstacles, the stages of sanding your oak flooring can begin.
It is important at this stage to begin with the right level of sandpaper. In our case, we opted for the 36 grit sandpaper. 36 is a very coarse type of sandpaper, and so therefore perfect for the removal of the tough hard wax oil layer and the excessively worn areas.
For the initial sandings, it is worth noting that the need to change to sandpaper discs will be greater than towards the end of the process. This is due to the finish clogging up the discs. As the finish is deteriorated, the discs will last longer.
| Grit | Purpose |
| 36 | Initial removal of the tough finish |
| 60 | Continual removal of the finish |
| 80 | First stage of preparation for finishing surface |
| 120 | Preparation of the wood floor for finishing |
Begin the sanding process by maintaining a constant speed across the boards. This consistency ensures that some areas of the boards are not sanded more so than others. Excessively sanding certain areas could lead to discrepancies once the finish has been applied.
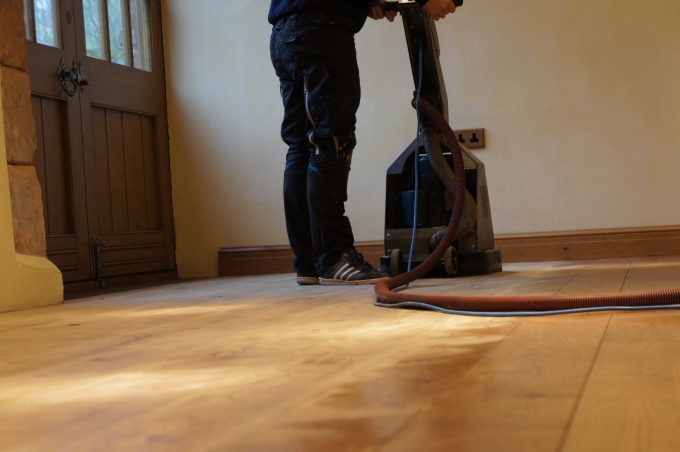
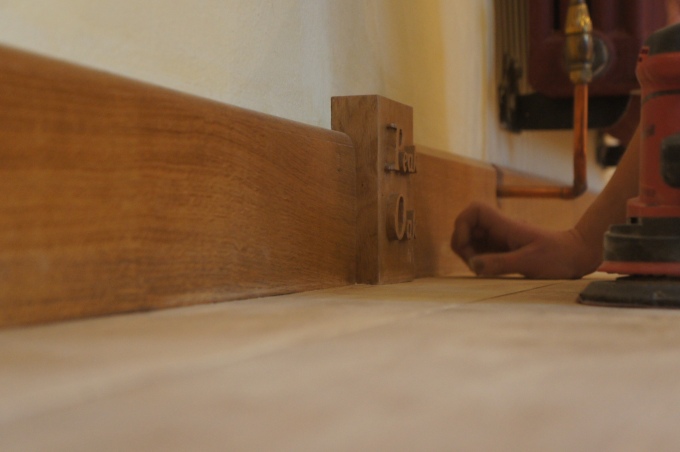
Follow the oak floorings natural grain direction up and down the boards. It is normally best to focus on a few board runs at a time, working your way up and down the room. Getting as close to the walls without touching the walls, at this point, will save further sanding later on.
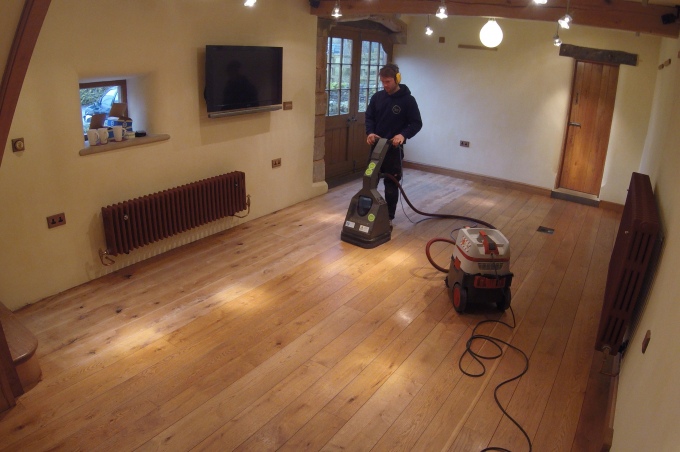
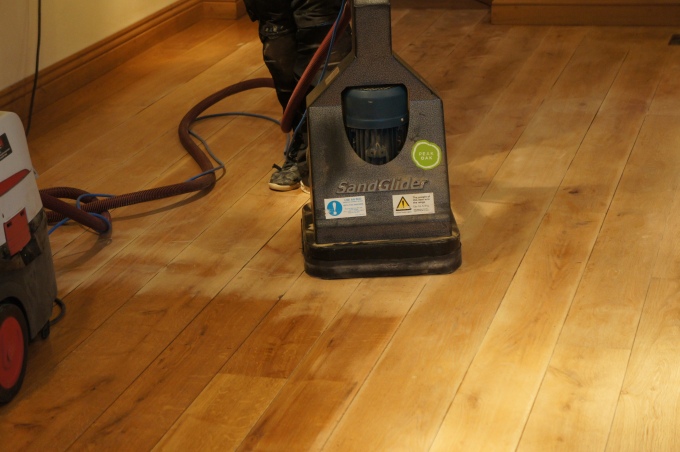
Continue this process, around the room - working through the coarse levels. As the oil is reduced and the oak flooring lightens, the need to change will become apparent.
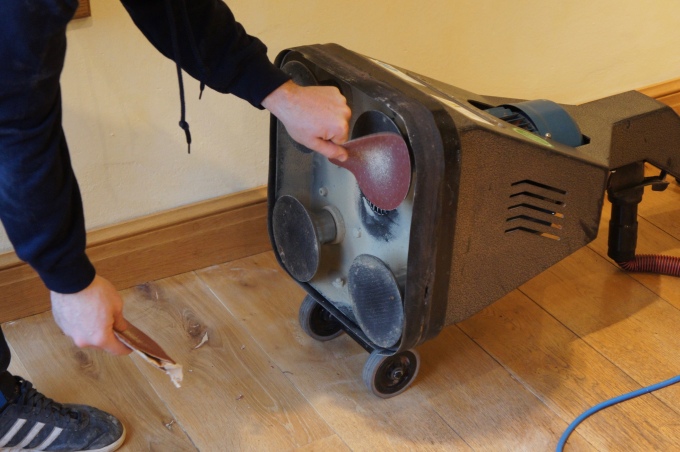

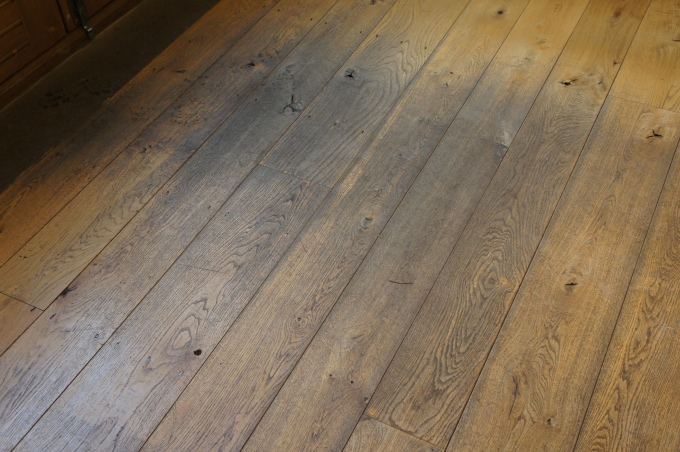
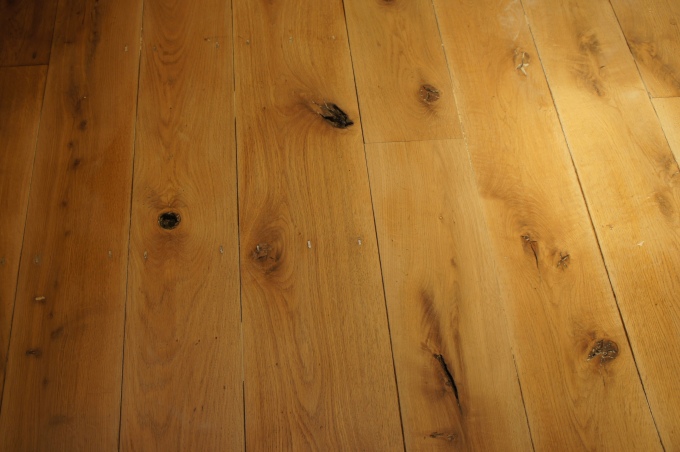
With this particular floor, the level of wear was quite high, leaving darker patches in-between the grooves of the boards. With the sanding machine not removing these fully, we found that using a scraper to scrape between the joints a great way to clear away the wear.
For the edges of the room, sanding should be done by hand or using an electric hand sander. This will enable you to get to all of the small, hard to reach areas in your room.
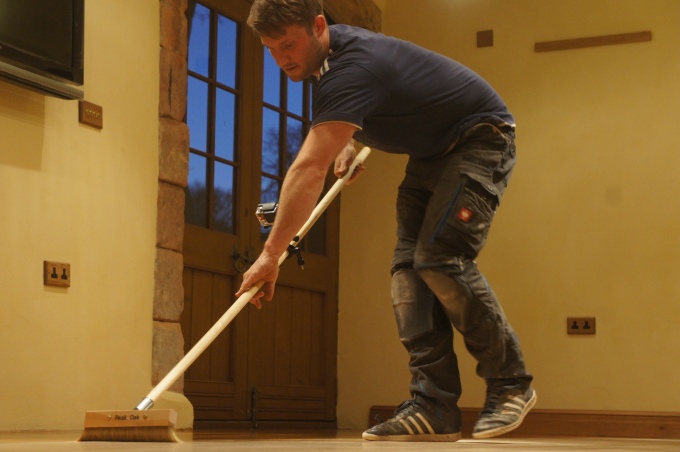
Just before the final run of sanding, we decided it was best to give the oak flooring a quick sweep with a vacuum cleaner. This ensured that any excess build up of dust was removed before the final sweep of sanding.
Refinishing
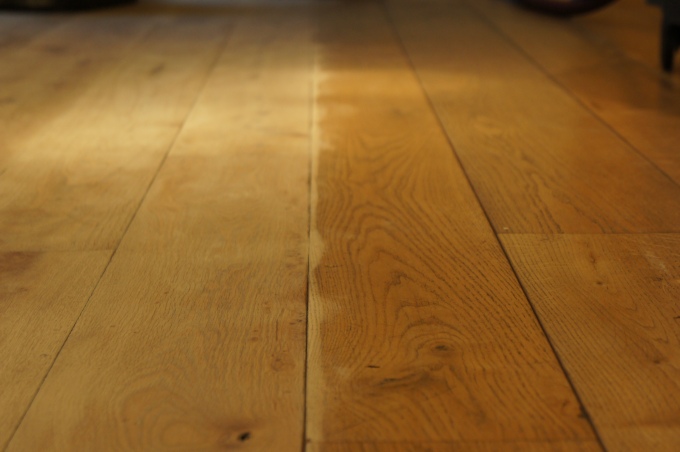
With the oak flooring sanded back to bare timber, the next stage is to recoat the floor with your chosen finish. The time between the final sanding and the new application should be as minimal as possible. This will ensure that the freshly sanded flooring does not become marked in its unprotected state.
Depending on your chosen finishing product, the application process from this point will differ. For the refinishing process, we are reapplying a hard wax oil finish (Blanchon Hard Waxoil - Natural to be precise). More information on this application process can be seen in our guide on How To Apply Osmo Polyx Oil.
Before the application of the finish can begin, the surface of the unfinished oak flooring needs to be thoroughly cleaned to ensure that no dust or grit remains on the surface.
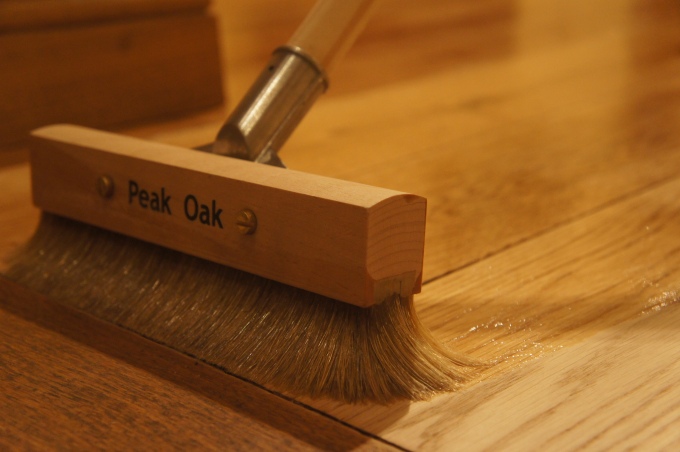
To apply the hard wax oil, we always recommend application with a natural floor brush - such as our Peak Oak Floor Brush. A brush of this type simply fits onto the end of a standard broom handle, allowing for quick and easy application of the finish.
The hard wax oil needs to well stirred and poured into a tray/container. Dab the floor brush into the mixture of the oil, being careful not to overfill the brush.
Starting from the furthest point of exit, apply the oil thinly and evenly along the length of the boards. Like during the sanding process, it is best to work down a few runs of boards at a time.
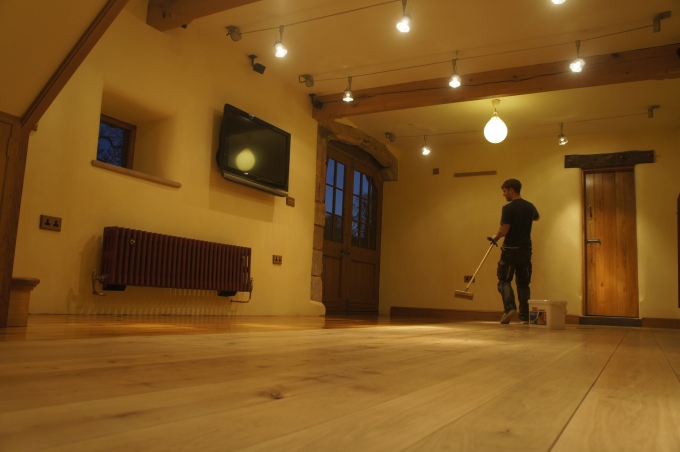
Continue this process working across and down the room, until the whole area has been covered.
Once complete, the area was then left to dry with good ventilation. Depending on your hard wax oil brand, this will take varying times. In our case, we left the finish to dry over night.
As we were looking to achieve a "glass-like" feel to the floor which is completely smooth to the touch, before applying the second coat we opted to "de-nib" the first coat. This process involved sanding over the surface of the boards very minimally, which helps to take off the slight bit of raising that can occur when applying an oiled finish. This process may require additional coats to be applied
Again the surface had be cleaned to remove any dust particles sitting on the surface of the boards.
Using the same method as the first coat, the second coat was applied.
With all the coats applied using the same method, the process of sanding and recoating the oak flooring is complete.
During the first few days of use precautions should be taken as the finish cures. Full curing normally takes 8-10 days.


4 Comments
That floor looks wonderful! Could I just ask if that is the non-colouring Osmo or the regular oil? I am just about to re-oil our floors so would love to see them come up as good as your showroom!
Ann Spencer August 5, 2019 at 5:31pm
Hi Anne,
This particular floor was recoated using the clear version of the Blanchon Hard Waxoi. This would give a similar colour to the clear version of the Osmo Polyx Oil.
Hope this helps
Peak Oak August 5, 2019 at 5:49pm
Why did you use an orbital sander and not a drum sander? What is the difference between these two sander? And when the size of your planks are thinner does that change the decision which sander to use?
Thank you!
Elke Luyten February 28, 2022 at 2:05pm
Hi Elke,
We used an orbital sander rather than a drum sander as a drum tends to be a more aggressive sander. Orbital sanders are easier to control in comparison to drum sanders when sanding oak floors.
Hope this helps, if we can assist any further please give us a call.
Peak Oak March 14, 2022 at 3:14pm
Add a comment